What Is Scheduled Tasks?
Scheduled Task is a tool included in Plesk control panel enables you to run scripts on your server at a specific time. It also makes the system automatically run scripts for you. The Scheduled Task in Plesk is definitely matching cron jobs in cPanel control panel.
Add Scheduled Task:
To add scheduled task, follow the steps:
- Firstly, log in to Plesk.
- Go to Websites & Domains – Scheduled Tasks – Add Task.
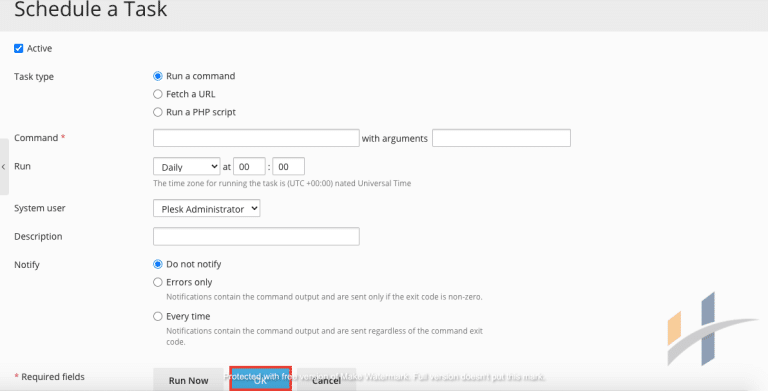
- After that, you need to select the task type, depending on your purpose:
- Run a command – Specify the full path to the executable file to be run. This includes binary files, shell scripts, and batch files.
- Fetch a URL – Send a request (cURL) to a specific URL.
- Run a PHP script – Specify the path to the script relative to your virtual host directory. PHP version can be specified.
- Set/frequency-time task should run.
- Add a Description of the task. (Optional).
- Select notification preference.
- Click OK to schedule the task or click Run Now to schedule the task and immediately run it.

Remove Scheduled Task
To remove scheduled task, follow the steps:
- Firstly, log in to Plesk.
- Go to Websites & Domains – Scheduled Tasks – Add Task.
- Select the name of the task that you would like to remove.
- Click on the Remove button.
- After that, it will load a new page and ask if you really want to delete it. Check the Confirm Removal box and click on the OK button.
- Finally, the Scheduled Tasks screen will appears and it will say: Information: Scheduled tasks were removed.”
