In this article we will describe to you how to configure Web Disk accounts in cPanel. After you configure a Web Disk account, you can use the account to access your web files.
How To Create Web Disk Account in cPanel
Before you can access files remotely using Web Disk, you must create a Web Disk account. So, follow these steps:- Firstly, log in to cPanel.
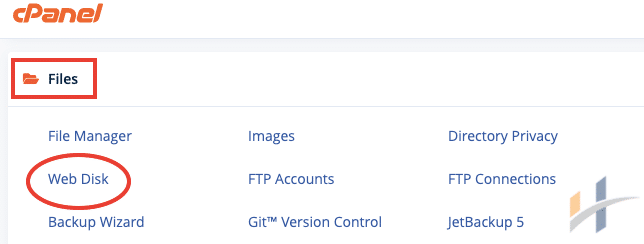
- Locate FILES section, then click Web Disk.

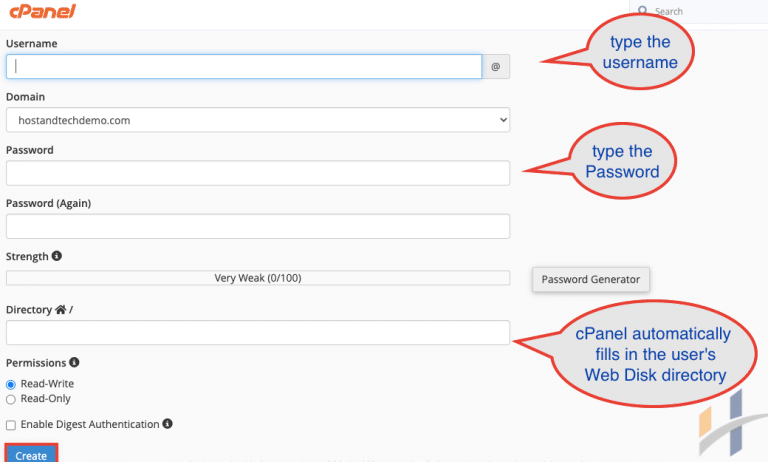
- Under Create an Additional Web Disk Account, type the username, in the Username text box.
- Type the password, in the New Password text box.
- In the Password (Again) text box, retype the password.
Note
You can click Password Generator and cPanel generates a strong, random password for you.
- In the Directory text box, cPanel automatically fills in the user’s Web Disk directory based on the username that you typed. To change the directory, type the directory name you want to use in this text box.
- The default permissions for the directory are for full read and write access. To grant the user read permissions only, click Read-Only.
- Select the Enable Digest Authentication check box, To enable digest authentication.
Note
If you are using Windows Vista, Windows 7, or Windows 8, and you want to use an unencrypted Web Disk connection, you must enable digest authentication.
- Finally, click Create.

How To Modifying Web Disk Accounts
After you have created a Web Disk user account, you can modify it. You can change the password, set permissions, enable digest authentication, and more. So follow these steps:
- Firstly, log in to cPanel.
- Locate FILES section, then click Web Disk.
- Under Manage Additional Web Disk Accounts, locate the account that you want to modify.
- Then, click Enable Digest Authentication, to enable digest authentication.
- To change the account password, click Change Password.
- Click Set Read-Only or Set Read-Write, to change the account permissions.
How To Delete Web Disk Accounts
To delete a Web Disk account, follow these steps:
- Firstly, log in to cPanel.
- Locate FILES section, then click Web Disk.
- Under Manage Additional Web Disk Accounts, locate the account that you want to delete, and then click Delete.
- Finally, click Delete Web Disk Account to confirm the deletion.
Now you Know how to configure web disk accounts. visit WHM/cPanel section for more information.
